> ## Documentation Index
> Fetch the complete documentation index at: https://turnkey-0e7c1f5b-traian-remove-eip-712-note.mintlify.site/llms.txt
> Use this file to discover all available pages before exploring further.
# Getting started with @turnkey/core
> Learn how to set up `@turnkey/core` in your frontend JavaScript application. This page will guide you through creating a Turnkey organization, configuring authentication, installing the SDK, and initializing the client.
## Turnkey organization setup
To start, you must create a Turnkey organization via the [Turnkey dashboard](https://app.turnkey.com). The steps are described in the [Account Setup](/get-started/quickstart) section.
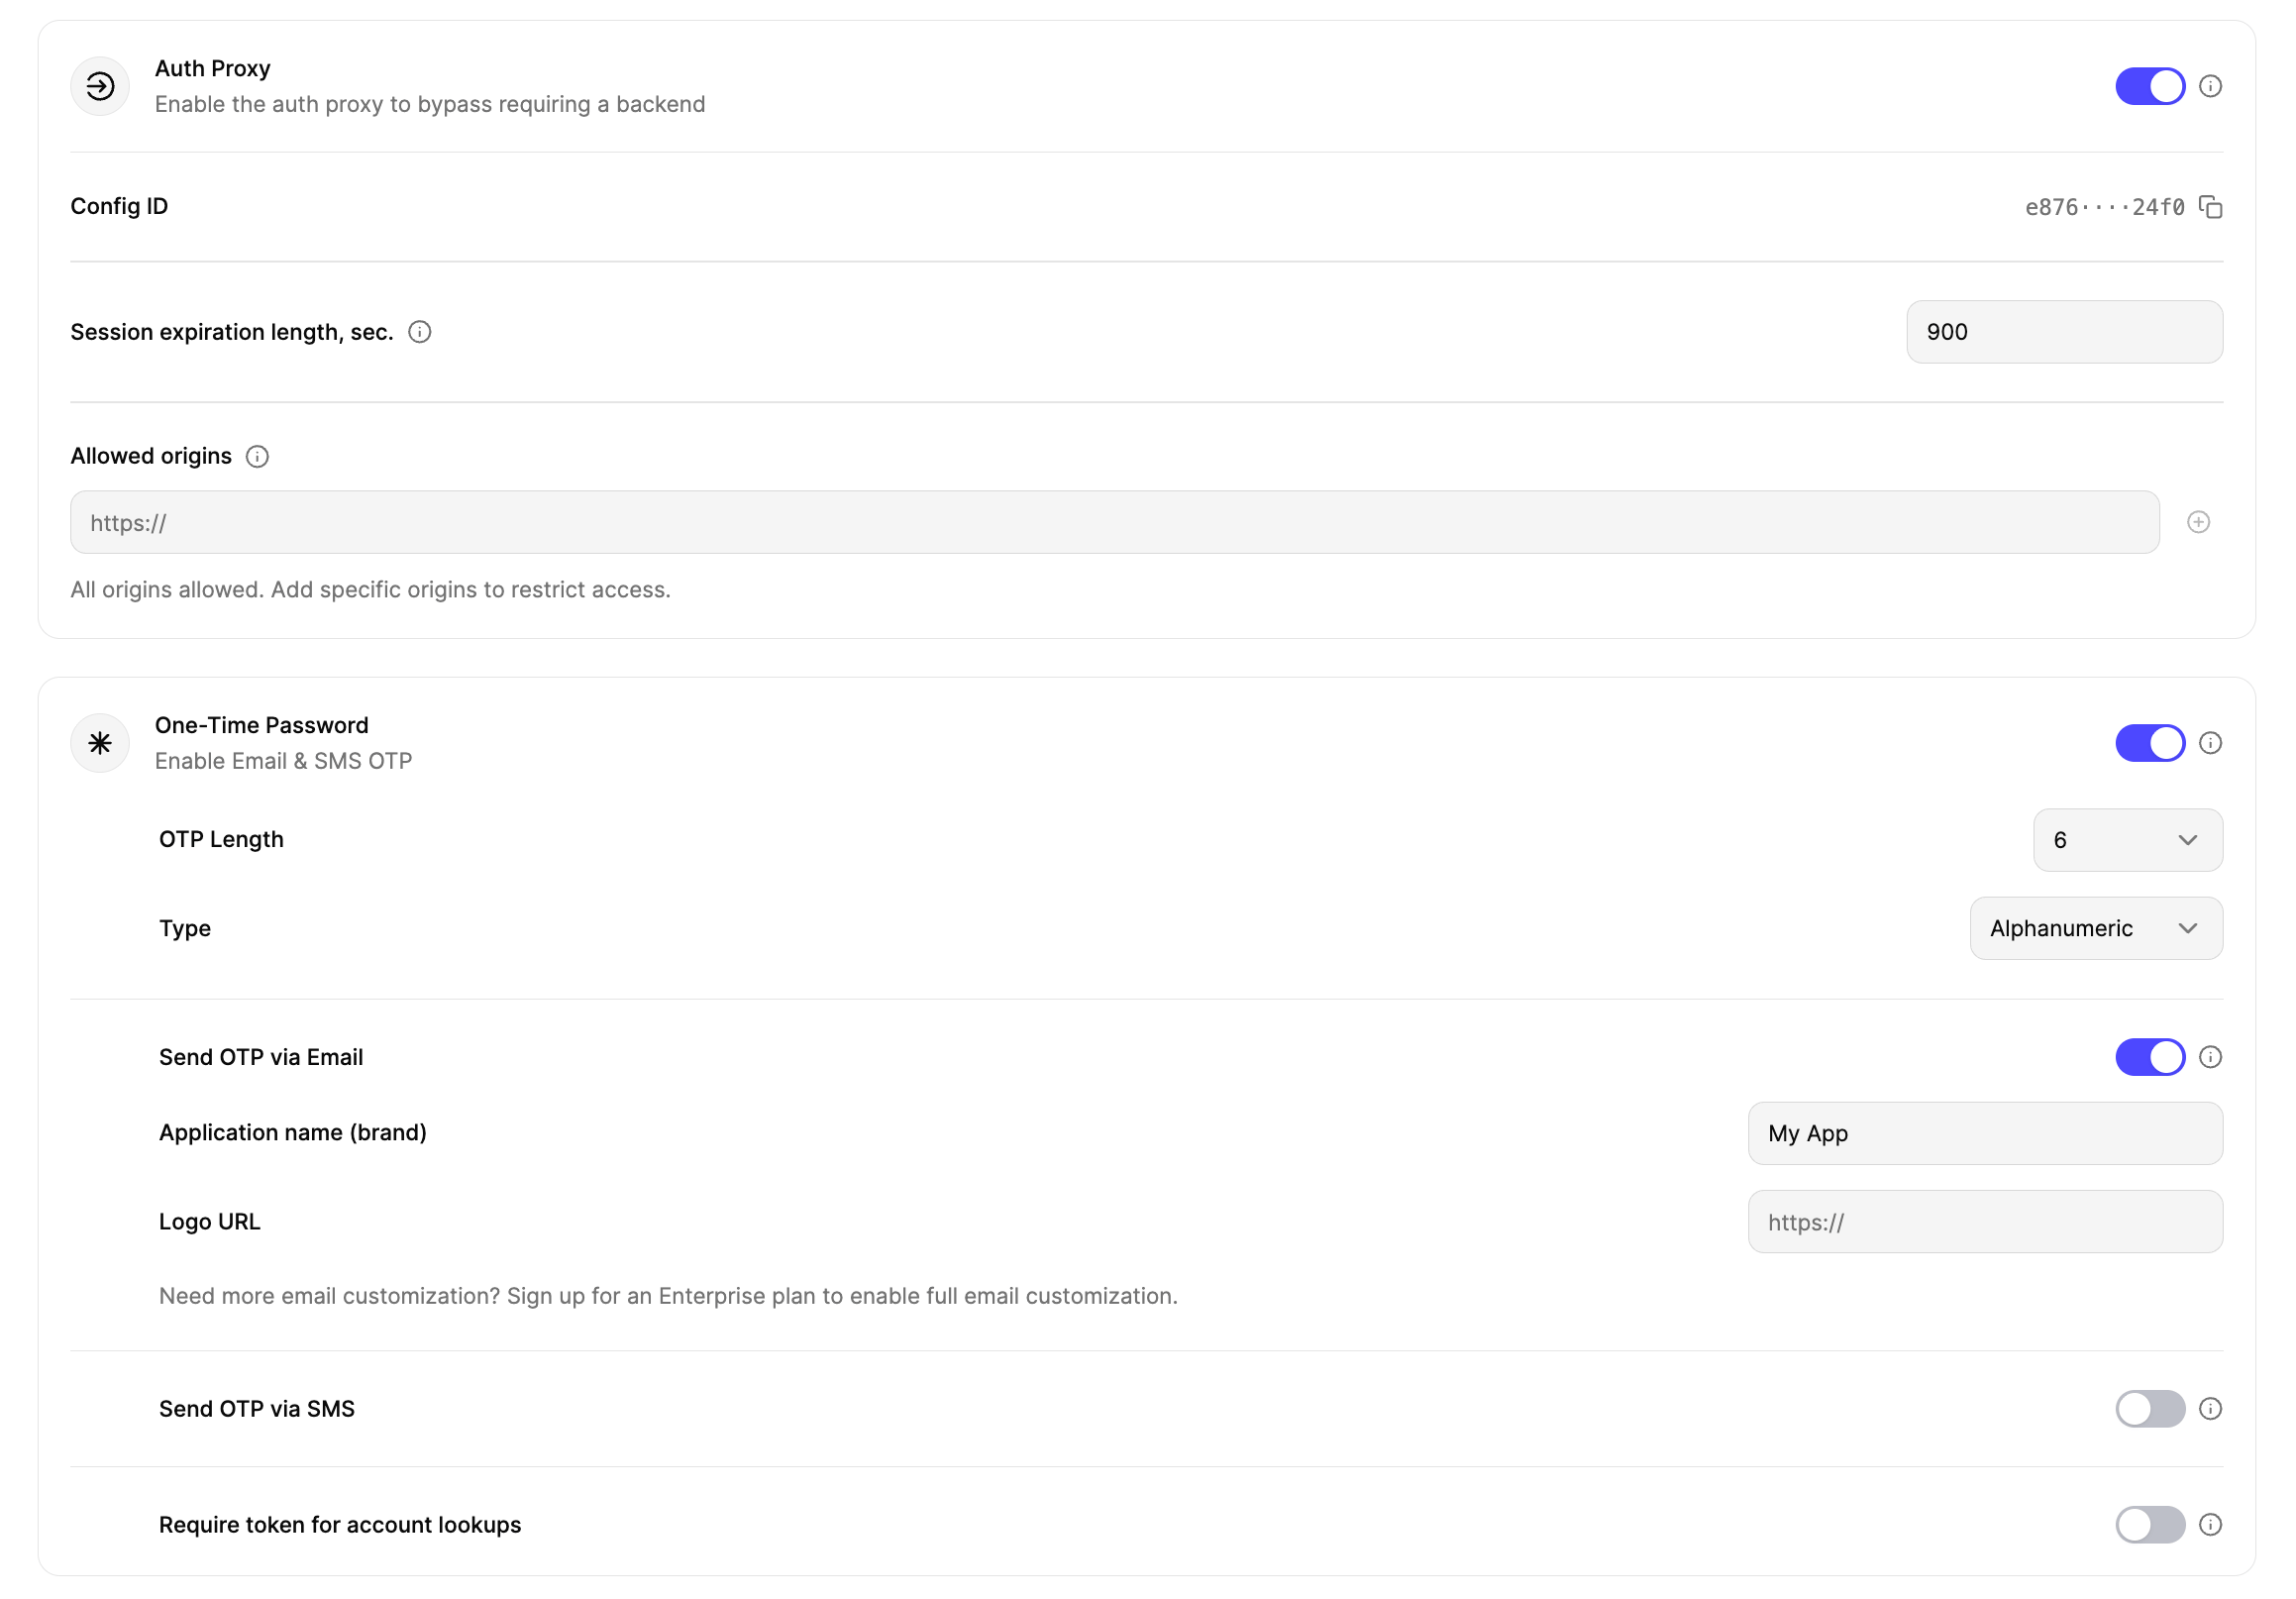
For this setup, we will use Turnkey's **Auth Proxy** to handle authentication. You can enable and configure this through the Turnkey dashboard.
Navigate to the **Auth** section in the Turnkey dashboard and enable the
**Auth Proxy**.
 You can choose which auth methods to enable and customize various options from
this screen. For this quickstart, let's enable **email OTP**.
When you're done, click **Save**.
You can choose which auth methods to enable and customize various options from
this screen. For this quickstart, let's enable **email OTP**.
When you're done, click **Save**.
 Once you're finished with the auth proxy setup, copy your **Auth Proxy Config ID** and your **Organization ID** from the dashboard.

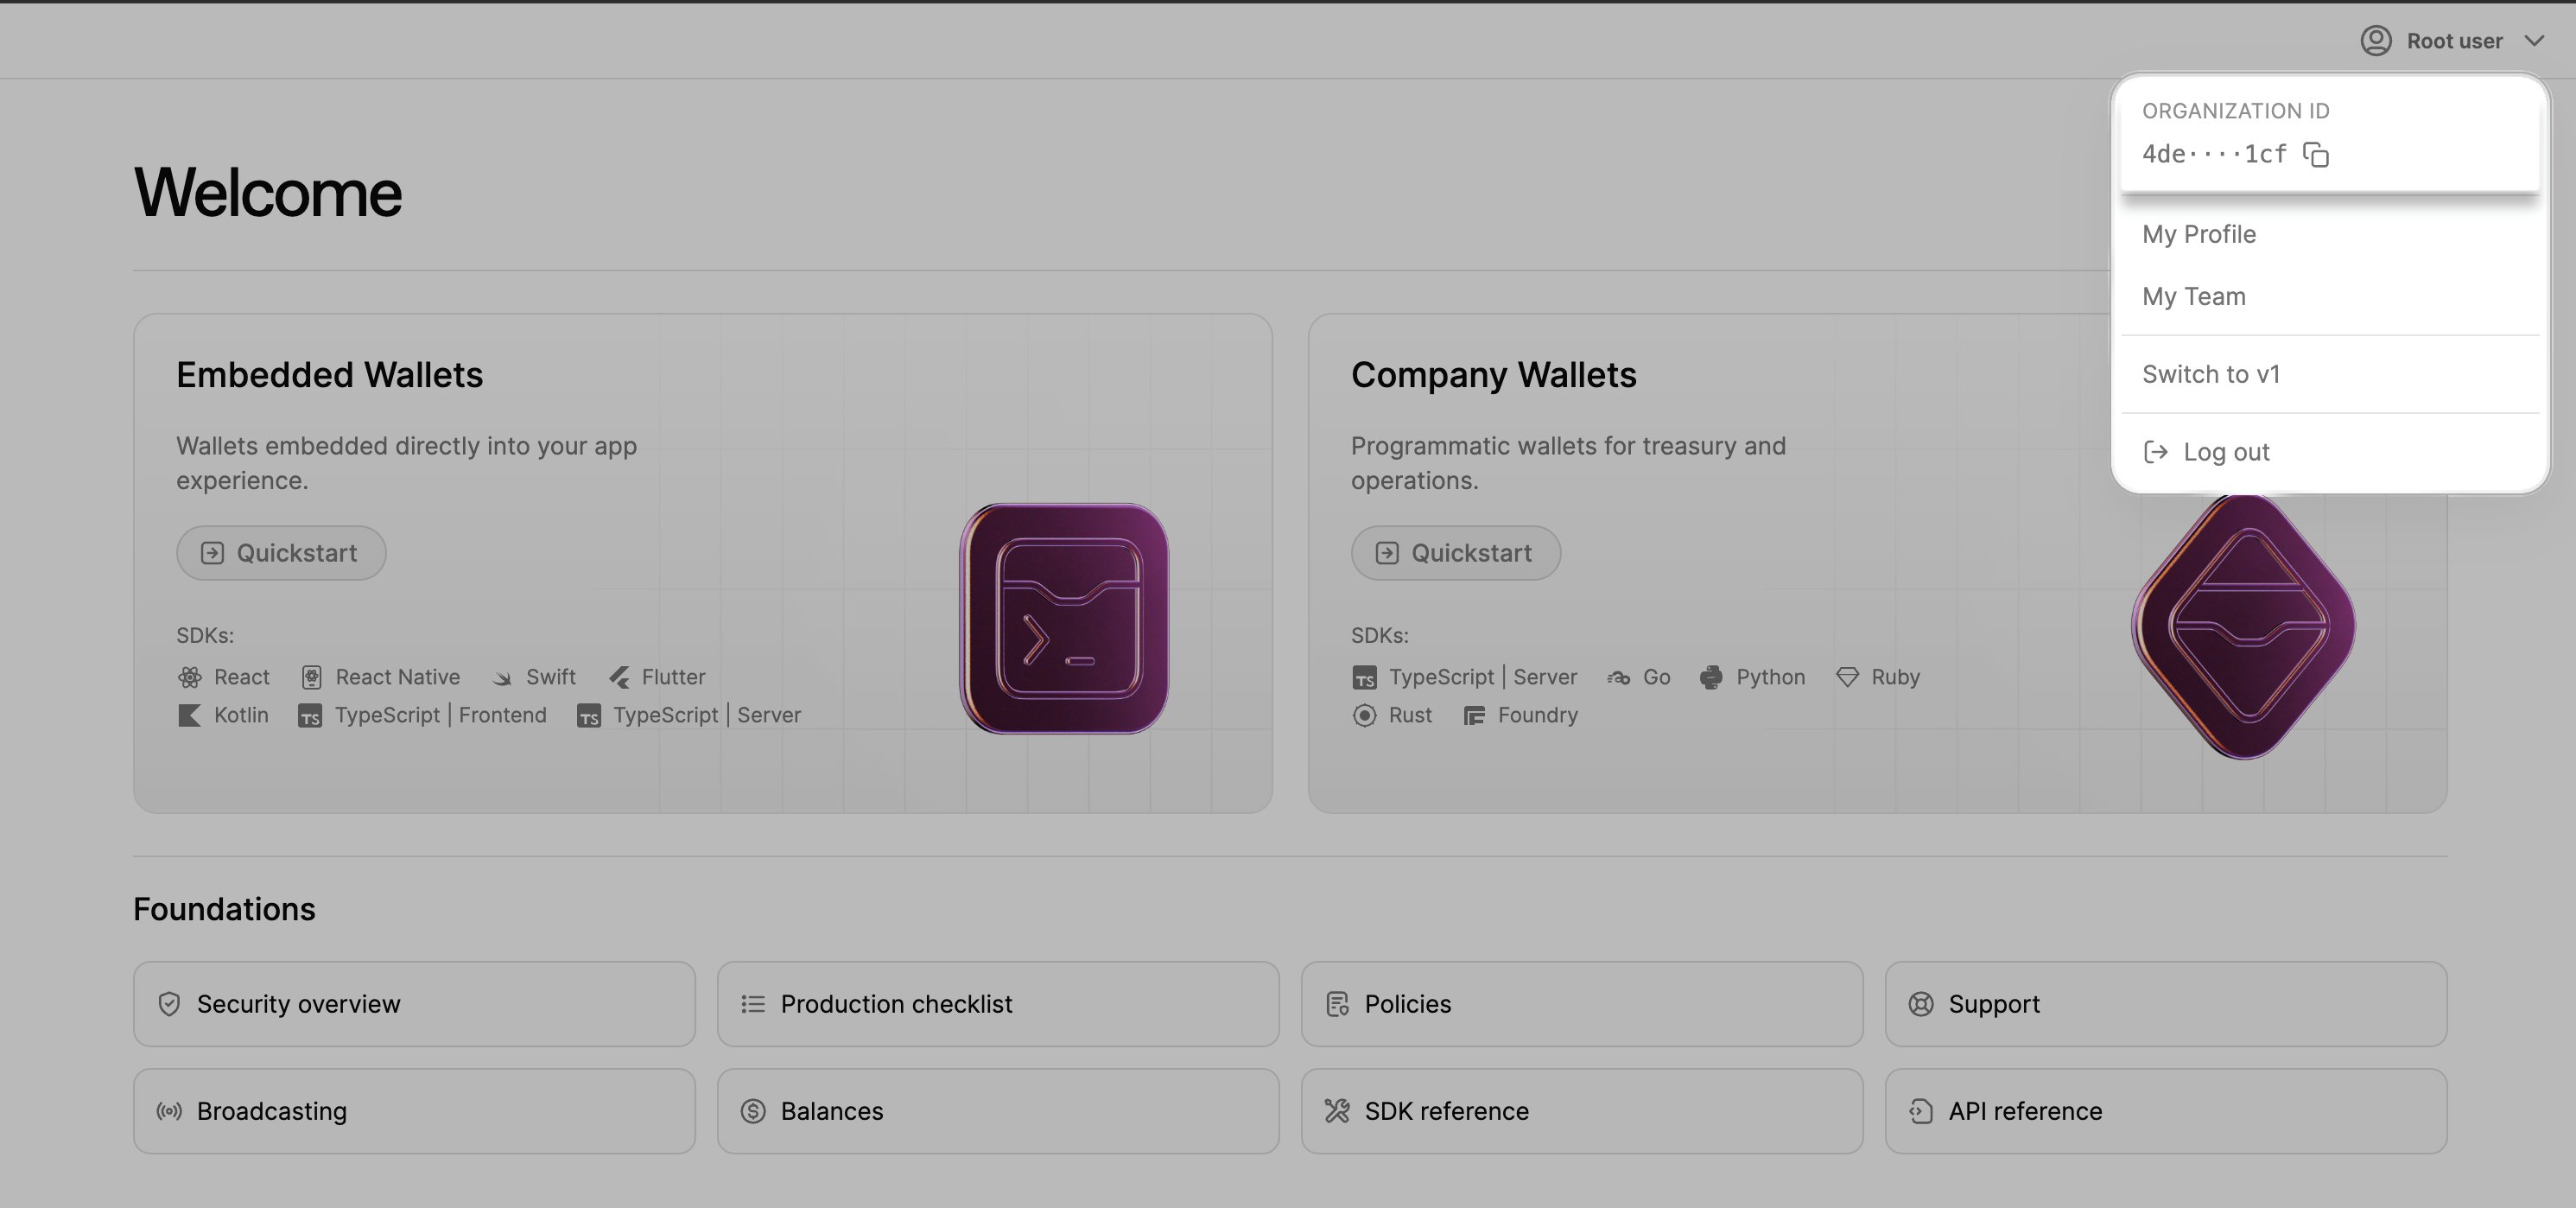 These values will be required to configure the SDK in your app.
***
## Installation
Install the Turnkey Core SDK into your project:
```bash npm theme={null}
npm install @turnkey/core
```
```bash pnpm theme={null}
pnpm add @turnkey/core
```
```bash yarn theme={null}
yarn add @turnkey/core
```
## React Native setup
If you're using React Native, there's some additional setup required. You can skip this section if you're using a web framework.
Install the following peer dependencies.
```bash npm theme={null}
npm install @react-native-async-storage/async-storage react-native-keychain @turnkey/react-native-passkey-stamper
```
```bash pnpm theme={null}
pnpm add @react-native-async-storage/async-storage react-native-keychain @turnkey/react-native-passkey-stamper
```
```bash yarn theme={null}
yarn add @react-native-async-storage/async-storage react-native-keychain @turnkey/react-native-passkey-stamper
```
If you're not using Expo, you may need to install the iOS dependencies.
```bash theme={null}
npx pod-install
# or
cd ios && pod install
```
`@turnkey/core` requires a polyfill to work in React Native.
Install the `react-native-get-random-values` package.
```bash npm theme={null}
npm install react-native-get-random-values
```
```bash pnpm theme={null}
pnpm add react-native-get-random-values
```
```bash yarn theme={null}
yarn add react-native-get-random-values
```
Then, import it at the top of your entry file (e.g. `index.js`, `entry.js` etc.). If you don't have this file, you'll need to create one.
```ts index.js theme={null}
import 'react-native-get-random-values';
// ... other imports
// You may need this line if you're using Expo Router
import 'expo-router/entry';
```
You'll need to add this file to your `package.json` under the `main` field if it's not already there.
```json package.json theme={null}
{
"main": "index.js", // May be named differently in your project
// ... other fields
}
```
## Client initialization
Unlike `@turnkey/react-wallet-kit`, `@turnkey/core` doesn't provide a React provider or hooks — you work directly with the TurnkeyClient.
Here's a minimal setup example:
```ts theme={null}
import { TurnkeyClient, TurnkeyError } from "@turnkey/core";
const client = new TurnkeyClient({
organizationId: "YOUR_ORGANIZATION_ID",
authProxyConfigId: "YOUR_AUTH_PROXY_CONFIG_ID", // Can be omitted if you don't use the Auth Proxy
});
// Initialize the client. Required for async initialization.
await client.init();
```
## Optional configuration
The client accepts optional configuration for **passkeys** and **external browser wallets**. If omitted, those features will not be initialized.
### Passkeys
```ts theme={null}
const client = new TurnkeyClient({
organizationId: "...",
authProxyConfigId: "...",
passkeyConfig: {
rpId: "example.com", // Required for React Native
timeout: 60000, // Default: 5 minutes
userVerification: "preferred",
},
});
```
All fields are optional in web environments.
On React Native, `rpId` is required. We recommend following [this guide](https://github.com/f-23/react-native-passkey?tab=readme-ov-file#configuration) to set up associated domains for iOS and Android.
### External browser wallets
```ts theme={null}
const client = new TurnkeyClient({
organizationId: "...",
authProxyConfigId: "...",
walletConfig: {
chains: {
ethereum: {
native: true,
walletConnectNamespaces: ["eip155:1"], // Ethereum mainnet
},
solana: {
native: true,
walletConnectNamespaces: ["solana:mainnet"],
},
},
// Optional: Configure WalletConnect. WalletConnect is used for connecting wallets from mobile devices.
walletConnect: {
projectId: "YOUR_PROJECT_ID",
appMetadata: {
name: "My App",
description: "My dApp powered by Turnkey",
url: "https://example.com",
icons: ["https://example.com/icon.png"],
},
},
},
});
```
These values will be required to configure the SDK in your app.
***
## Installation
Install the Turnkey Core SDK into your project:
```bash npm theme={null}
npm install @turnkey/core
```
```bash pnpm theme={null}
pnpm add @turnkey/core
```
```bash yarn theme={null}
yarn add @turnkey/core
```
## React Native setup
If you're using React Native, there's some additional setup required. You can skip this section if you're using a web framework.
Install the following peer dependencies.
```bash npm theme={null}
npm install @react-native-async-storage/async-storage react-native-keychain @turnkey/react-native-passkey-stamper
```
```bash pnpm theme={null}
pnpm add @react-native-async-storage/async-storage react-native-keychain @turnkey/react-native-passkey-stamper
```
```bash yarn theme={null}
yarn add @react-native-async-storage/async-storage react-native-keychain @turnkey/react-native-passkey-stamper
```
If you're not using Expo, you may need to install the iOS dependencies.
```bash theme={null}
npx pod-install
# or
cd ios && pod install
```
`@turnkey/core` requires a polyfill to work in React Native.
Install the `react-native-get-random-values` package.
```bash npm theme={null}
npm install react-native-get-random-values
```
```bash pnpm theme={null}
pnpm add react-native-get-random-values
```
```bash yarn theme={null}
yarn add react-native-get-random-values
```
Then, import it at the top of your entry file (e.g. `index.js`, `entry.js` etc.). If you don't have this file, you'll need to create one.
```ts index.js theme={null}
import 'react-native-get-random-values';
// ... other imports
// You may need this line if you're using Expo Router
import 'expo-router/entry';
```
You'll need to add this file to your `package.json` under the `main` field if it's not already there.
```json package.json theme={null}
{
"main": "index.js", // May be named differently in your project
// ... other fields
}
```
## Client initialization
Unlike `@turnkey/react-wallet-kit`, `@turnkey/core` doesn't provide a React provider or hooks — you work directly with the TurnkeyClient.
Here's a minimal setup example:
```ts theme={null}
import { TurnkeyClient, TurnkeyError } from "@turnkey/core";
const client = new TurnkeyClient({
organizationId: "YOUR_ORGANIZATION_ID",
authProxyConfigId: "YOUR_AUTH_PROXY_CONFIG_ID", // Can be omitted if you don't use the Auth Proxy
});
// Initialize the client. Required for async initialization.
await client.init();
```
## Optional configuration
The client accepts optional configuration for **passkeys** and **external browser wallets**. If omitted, those features will not be initialized.
### Passkeys
```ts theme={null}
const client = new TurnkeyClient({
organizationId: "...",
authProxyConfigId: "...",
passkeyConfig: {
rpId: "example.com", // Required for React Native
timeout: 60000, // Default: 5 minutes
userVerification: "preferred",
},
});
```
All fields are optional in web environments.
On React Native, `rpId` is required. We recommend following [this guide](https://github.com/f-23/react-native-passkey?tab=readme-ov-file#configuration) to set up associated domains for iOS and Android.
### External browser wallets
```ts theme={null}
const client = new TurnkeyClient({
organizationId: "...",
authProxyConfigId: "...",
walletConfig: {
chains: {
ethereum: {
native: true,
walletConnectNamespaces: ["eip155:1"], // Ethereum mainnet
},
solana: {
native: true,
walletConnectNamespaces: ["solana:mainnet"],
},
},
// Optional: Configure WalletConnect. WalletConnect is used for connecting wallets from mobile devices.
walletConnect: {
projectId: "YOUR_PROJECT_ID",
appMetadata: {
name: "My App",
description: "My dApp powered by Turnkey",
url: "https://example.com",
icons: ["https://example.com/icon.png"],
},
},
},
});
```